

Table of Contents
Introduction
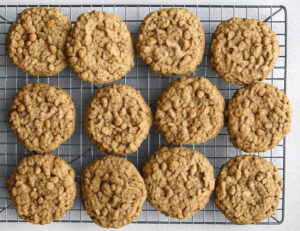
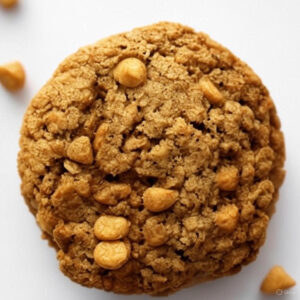
Welcome to the world of homemade Oat Scotchies—a delightful fusion of chewy oats and rich butterscotch that promises to elevate your baking repertoire. These cookies are not just delicious; they offer a heartwarming experience that’s perfect for any occasion. Making Oat Scotchies from scratch is an exciting culinary adventure, and you’ll be amazed at how simple and versatile this recipe can be. Whether you’re baking for family, friends, or yourself, this comprehensive guide will walk you through each step, ensuring your Oat Scotchies turn out perfect every time.
Ingredients
Here’s what you’ll need to make about 4 dozen irresistible cookies:
-
1/2 pound (2 sticks) margarine or unsalted butter, softened
-
3/4 cup granulated sugar
-
3/4 cup packed brown sugar
-
2 large eggs
-
1 teaspoon vanilla extract
-
1 1/4 cups all-purpose flour
-
1 teaspoon baking soda
-
1/2 teaspoon salt (optional)
-
3 cups Quaker® Oats (old-fashioned or quick oats, uncooked)
-
1 package (approx. 11 oz) butterscotch chips
Step-by-Step Instructions
Follow these simple steps to bake the perfect Oatmeal Scotchies:
-
Preheat your oven to 375°F (190°C).
-
In a large mixing bowl, cream together the softened butter and both sugars until smooth and fluffy.
-
Beat in the eggs one at a time, then add the vanilla extract and continue mixing.
-
In a separate bowl, whisk together the flour, baking soda, and salt.
-
Gradually combine the dry mixture with the wet ingredients until just blended.
-
Stir in the oats and butterscotch chips until the dough is fully mixed.
-
Drop rounded tablespoons of dough onto ungreased baking sheets, spacing them 2 inches apart.
-
Bake for:
-
7 to 8 minutes for chewy cookies
-
9 to 10 minutes for crisp cookies
-
-
Let them cool on the baking sheet for 2 minutes before transferring to a wire rack.
-
Once completely cooled, store in an airtight container to maintain freshness.
Pro Tips for the Best Results
-
Butter over margarine gives a richer flavor.
-
Use old-fashioned oats if you prefer more texture.
-
Chill the dough for 30 minutes for cookies that don’t spread too much.
-
Want extra flair? Sprinkle sea salt on top before baking.
Nutritional Information (Per Cookie)
| Nutrient | Amount |
|---|---|
| Calories | 130 kcal |
| Total Fat | 6g |
| Saturated Fat | 5g |
| Cholesterol | 20mg |
| Sodium | 25mg |
| Carbohydrates | 17g |
| Fiber | <1g |
| Sugar | 11g |
| Protein | 2g |
Micronutrients (% Daily Value)
-
Vitamin A: 2%
-
Iron: 4%
-
Thiamin: 4%
-
Magnesium: 4%
-
Whole Grains: 5g
-
Potassium: 1%
Note: Values based on a 2000-calorie daily intake.
Conclusion
Making homemade Oat Scotchies is a rewarding experience that fills your kitchen with the comforting aroma of freshly baked cookies. With this step-by-step guide, you’re now equipped to master the art of Oat Scotchies, creating delicious treats that your family and friends will love. We encourage you to share your baking journey and any creative variations you come up with. Happy baking!
FAQs
Q1: Can I substitute the butter with margarine or another type of fat?
Yes, you can substitute butter with margarine or other fats like coconut oil or vegetable shortening. However, keep in mind that this might alter the texture and flavour of your cookies. Margarine and butter have different moisture contents, so adjustments may be necessary. Coconut oil can impart a slight coconut taste to your cookies.
Q2: Can I make these cookies gluten-free?
Absolutely! You can make Oat Scotchies gluten-free by replacing the all-purpose flour with a gluten-free flour blend. Additionally, ensure that the oats you are using are certified gluten-free to prevent cross-contamination.
Q3: How do I store the dough if I want to bake the cookies later?
To store dough for later baking, shape the dough into balls and place them on a baking sheet lined with parchment paper. Freeze the dough balls until solid, then transfer them to a resealable freezer bag. You can bake the frozen dough balls directly from the freezer; just add a few extra minutes to the baking time.
Q4: Why did my cookies turn out too flat?
Cookies can turn out too flat if the dough is not chilled before baking. Chilling the dough helps prevent the cookies from spreading too much in the oven. Additionally, ensure your butter is not overly softened or melted, as this can also cause flat cookies.
Q5: Can I reduce the sugar in the recipe?
Yes, you can reduce the sugar content, but it may affect the texture and spread of the cookies. Reducing sugar can lead to less chewy and more cake-like cookies. You might need to experiment to find the perfect balance that suits your taste.
Q6: What can I use as an egg substitute?
You can use various egg substitutes such as flaxseed meal, applesauce, or commercial egg replacers. For every egg in the recipe, mix 1 tablespoon of flaxseed meal with 2.5 tablespoons of water and let it sit for a few minutes to thicken. Alternatively, use 1/4 cup of applesauce or follow the instructions on a commercial egg replacer package.
Q7: How can I make my Oat Scotchies more chewy or crunchy?
To make chewier cookies, slightly underbake them, allowing them to finish setting as they cool on the baking sheets. For crunchier cookies, bake them a bit longer until they are golden brown and fully set. Additionally, using a combination of brown and granulated sugar, as specified in the recipe, helps balance chewiness and crunchiness.
Feel free to reach out if you have more questions or need further assistance! Happy baking!