
Table of Contents
Fresh Bread at Home, Golden, Soft, and Beautifully Puffed
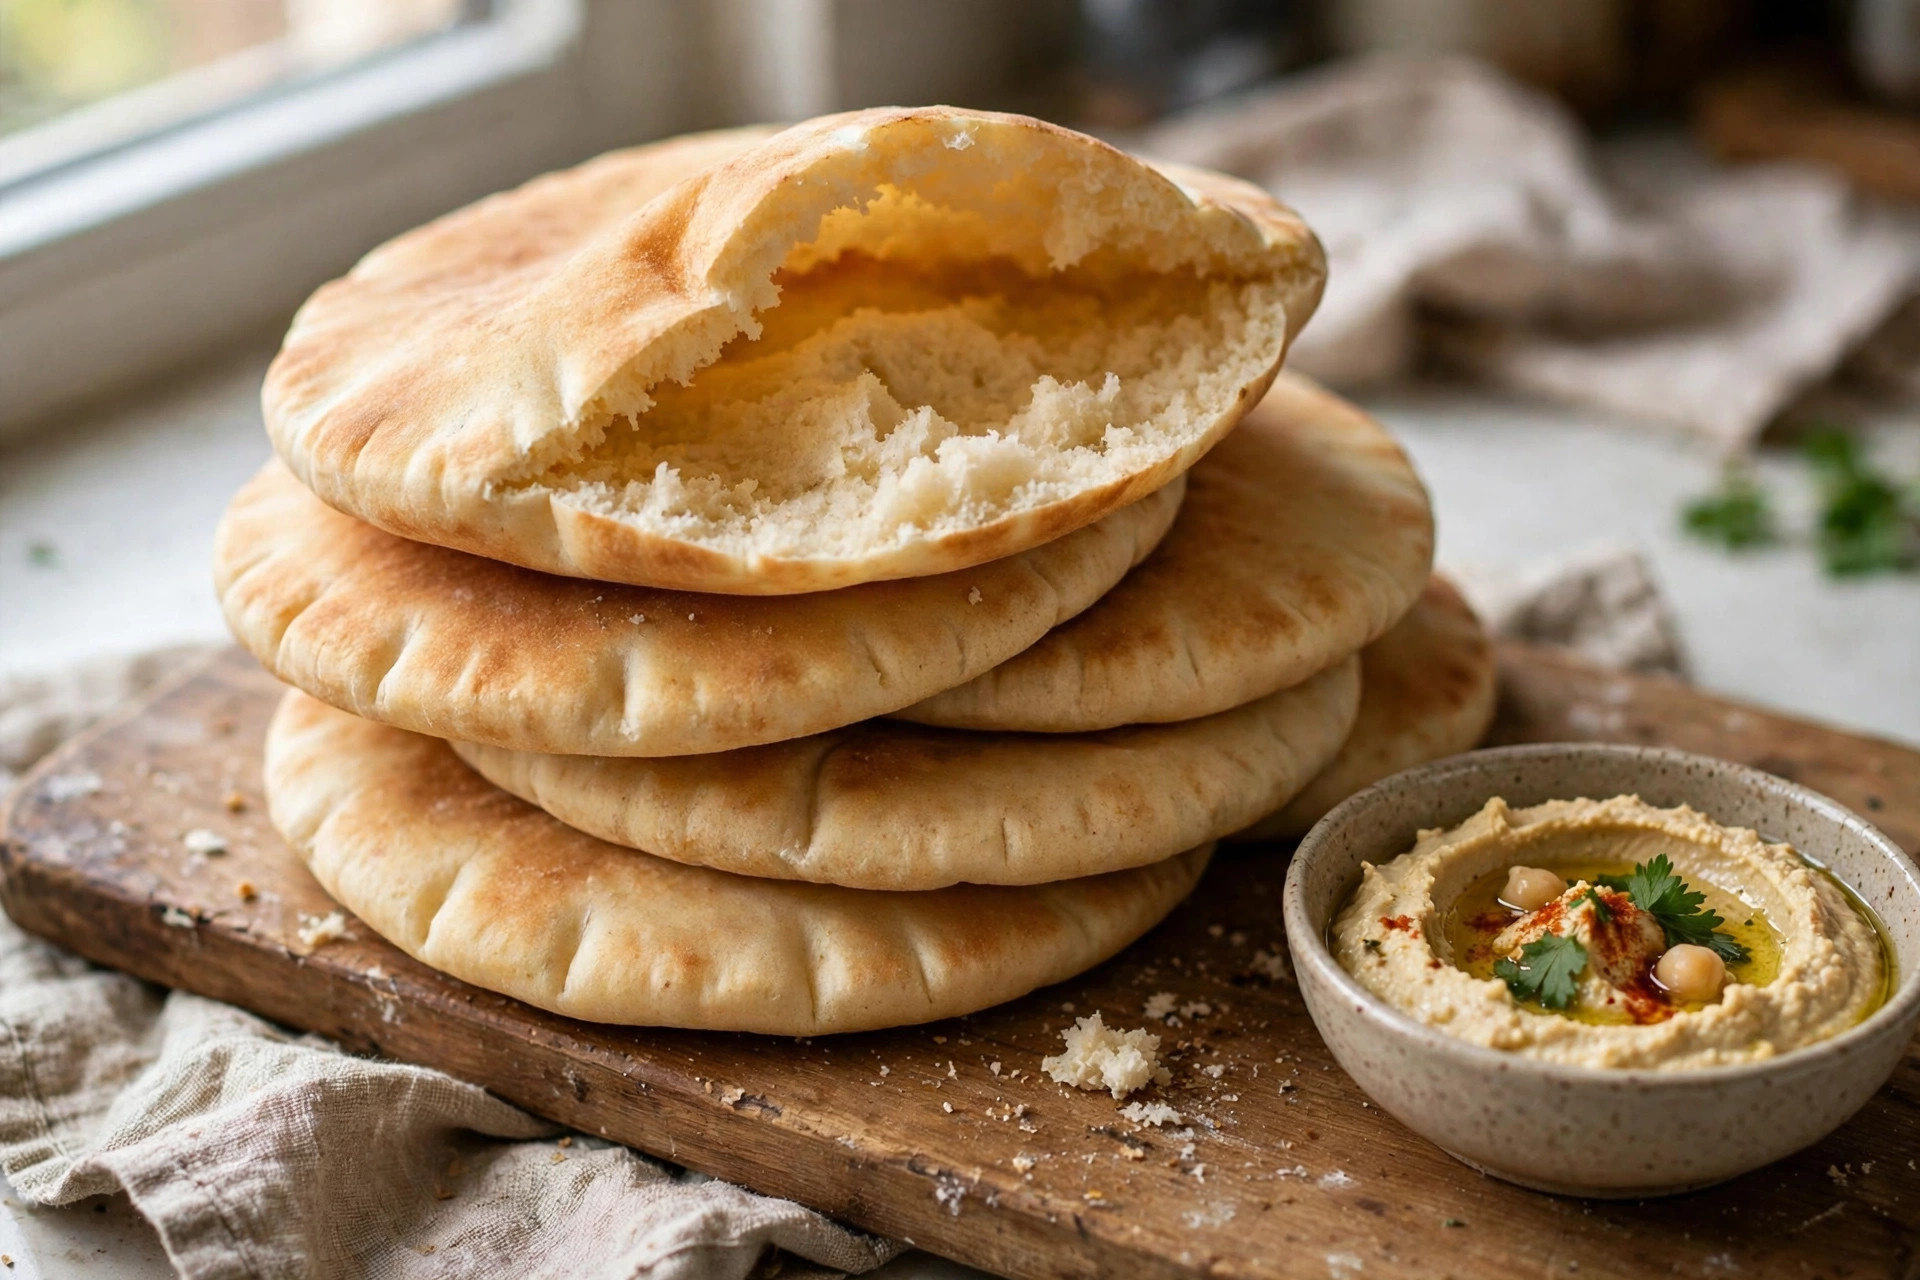
There’s something incredibly satisfying about making fresh bread at home, especially when it comes out of the oven golden, soft, and beautifully puffed. This homemade pita bread is one of those simple recipes that makes you wonder why you ever bought packaged flatbread.
The outside is lightly golden, the inside is tender, and each round is perfect for sandwiches, dipping, or enjoying warm with a little butter. Unlike complicated bread recipes that require hours of preparation, this easy homemade pita bread uses basic pantry ingredients and a straightforward method. You only need flour, yeast, water, a little olive oil, and some patience while the dough rises.
Whether you’re preparing breakfast, lunch, or a family dinner, these fluffy flatbreads are a wonderful addition to the table. And trust me, once the first warm pita comes out of the oven, keeping everyone away until dinner might become your biggest challenge!
Why You’ll Love This Homemade Pita Bread
This recipe is perfect for anyone who enjoys fresh, homemade bread without complicated techniques. The dough is soft and easy to handle. The ingredients are inexpensive and widely available. You can bake several pieces at once, making the recipe convenient for family meals. The finished bread has a tender texture with a lightly browned exterior. It’s also incredibly versatile — serve it with hummus, grilled chicken, roasted vegetables, cheese, or your favorite homemade dips. Some pieces may puff enough to form pockets, while others may remain soft and slightly thicker. Both are delicious. The bread can also be prepared ahead of time and frozen for later use.
Ingredients
Makes: approximately 8 medium pita breads | Prep time: about 30 minutes (plus rising) | First rise: 60–90 minutes | Bake time: 3–12 minutes per batch
- 3½ cups (440 g) all-purpose flour
- 1¼ cups (300 ml) warm water
- 2¼ teaspoons (7 g) instant yeast
- 1 tablespoon granulated sugar
- 1½ teaspoons salt
- 2 tablespoons olive oil
- 2 tablespoons plain yogurt, optional
- Extra flour for shaping
The yogurt is optional, but it can contribute a slightly softer texture.
Detailed Step-by-Step Instructions
- Prepare the ingredients. Begin by measuring all your ingredients. For the most consistent results, use a kitchen scale when measuring flour — too much flour can make the dough stiff and the finished bread dry. Warm the water to approximately 100–110°F (38–43°C). It should feel pleasantly warm rather than hot; very hot water can damage the yeast.
- Mix the dough. In a large mixing bowl, combine the flour, instant yeast, sugar, and salt. Stir until evenly distributed. Add the warm water, olive oil, and yogurt if using. Mix with a wooden spoon until a rough dough forms. The dough may look slightly sticky at first — that’s normal. Continue mixing until most of the flour has been incorporated.
- Knead until smooth. Transfer the dough to a lightly floured surface. Knead for approximately 8–10 minutes: push the dough away with the heel of your hand, fold it back, and turn it slightly. Repeat until the dough becomes smooth and elastic. If the dough sticks excessively, sprinkle a small amount of flour onto the surface, but avoid adding too much — a soft, slightly tacky dough generally produces more tender bread. If you’re using a stand mixer, knead with the dough hook for approximately 6–8 minutes on low to medium-low speed.
- First rise. Shape the dough into a smooth ball. Lightly grease a large bowl with olive oil. Place the dough inside and turn it once to coat the surface. Cover with a clean kitchen towel or plastic wrap. Let it rise in a warm, draft-free place for approximately 60–90 minutes. The dough should roughly double in size. The exact rising time depends on the temperature of your kitchen — if your kitchen is cool, the dough may need a little longer.
- Divide the dough. Once the dough has risen, gently press it down to release large air pockets. Transfer it to a lightly floured work surface. Divide it into 8 equal portions. Roll each portion into a smooth ball. Cover the dough balls with a clean towel and allow them to rest for approximately 10–15 minutes. This resting period relaxes the gluten and makes the dough easier to flatten.
- Flatten the dough. Take one dough ball and place it on a lightly floured surface. Use a rolling pin to flatten it into a round approximately 6 inches (15 cm) wide. For classic pocket-style pita, aim for an even thickness of approximately ¼ inch (6 mm). If you prefer thicker, softer flatbread, leave the dough slightly thicker. Try to keep the thickness consistent — uneven dough may puff irregularly during baking.
- Rest the shaped rounds. Place the flattened rounds on a lightly floured tray or parchment-lined baking sheet, leaving enough space between them. Cover loosely with a clean kitchen towel and allow them to rest for approximately 15–20 minutes. This helps the dough relax and become slightly puffy. Avoid leaving them uncovered, because the surface may dry out.
- Preheat the oven. For classic pita pockets, preheat your oven to 475°F (245°C). Place a heavy baking sheet, pizza stone, or baking steel inside while the oven heats — a thoroughly heated baking surface helps the bread puff quickly. Allow the oven to preheat for at least 20 minutes. For thicker, softer rounds that don’t necessarily form pockets, you can use a lower temperature of approximately 425°F (220°C).
- Bake the bread. Carefully transfer two or three dough rounds onto the hot baking surface. Bake classic thin pita for approximately 3–5 minutes — the bread should puff and develop a few lightly golden spots. For thicker rounds, bake at 425°F (220°C) for approximately 8–12 minutes, depending on their thickness; the bread should be cooked through and lightly golden. If necessary, flip the thicker rounds halfway through baking for more even coloring. Baking times may vary depending on your oven.
- Keep the bread soft. Remove the baked bread from the oven. Transfer it to a clean kitchen towel and cover the bread loosely while the remaining pieces bake. This helps retain moisture and keeps the flatbreads soft. Repeat until all the dough has been baked. Serve warm for the best flavor and texture.
The Secret to Soft and Fluffy Pita Bread
The key to delicious homemade pita bread is balancing moisture, kneading, and baking temperature. A dough that’s too dry will produce bread that’s tough or crumbly. A properly hydrated dough remains soft and slightly tacky. Kneading develops gluten, which helps the bread hold its structure. Resting the dough makes shaping easier and allows the yeast to produce gas. Baking temperature also affects the final texture: high heat encourages classic pita bread to puff and form a pocket, while moderate heat is useful for thicker flatbreads that are intended to stay soft and bread-like. Finally, covering the freshly baked bread with a clean towel helps prevent it from drying out too quickly. These small details make a noticeable difference.
Why Doesn’t My Pita Bread Puff?
If your pita bread doesn’t puff, don’t worry — it can still taste delicious. There are several possible reasons. The oven isn’t hot enough: classic pita needs strong heat to create steam quickly, and a thoroughly preheated baking surface helps the dough expand. The dough is too thick: thicker flatbreads may rise gently rather than forming a large pocket — for pocket-style pita, roll the dough evenly and relatively thin. The dough has dried out: if the surface becomes dry before baking, the bread may not expand properly, so keep shaped rounds covered while they rest. The dough is uneven: thin and thick areas may cook at different rates, so roll each round to an even thickness. The dough hasn’t rested enough: resting allows the gluten to relax, which helps the dough stretch during baking. Remember, a pita without a pocket is still a perfectly good flatbread.
Can You Make Pita Bread in a Skillet?
Absolutely! If you don’t want to use the oven, a skillet is a convenient alternative. Heat a heavy skillet over medium-high heat. Place one flattened dough round into the dry skillet. Cook for approximately 1–2 minutes until bubbles begin to appear. Flip and cook the other side for another 1–2 minutes. Turn again if needed until the bread is cooked through and lightly browned. Thicker rounds may require slightly longer cooking over moderate heat. Transfer the finished bread to a clean towel and cover. Skillet-cooked pita often develops attractive golden spots and a wonderfully soft texture.
Delicious Ways to Serve Homemade Pita Bread
With hummus: Cut the pita into wedges and serve with creamy hummus — the soft bread is perfect for scooping up the dip.
With grilled chicken: Fill a pita pocket with grilled chicken, lettuce, tomatoes, and yogurt sauce. It’s a delicious lunch or easy dinner.
With eggs and cheese: Warm a pita and fill it with scrambled eggs and melted cheese. Add sliced tomatoes or fresh herbs for extra flavor.
With soup: Serve the flatbread alongside lentil soup, vegetable soup, or chicken soup — it’s perfect for dipping.
With olive oil and herbs: Brush warm pita with a little olive oil and sprinkle with oregano, parsley, or za’atar. This simple preparation is delicious as a snack.
Easy Homemade Pita Bread Variations
Garlic pita bread: Mix 2 tablespoons melted butter with one minced garlic clove. Brush the mixture over the warm bread and sprinkle with fresh parsley.
Whole wheat pita bread: Replace approximately half the all-purpose flour with whole wheat flour. You may need a little additional water because whole wheat flour absorbs more moisture. The bread will have a slightly nuttier flavor.
Sesame pita bread: Brush the dough lightly with water before baking. Sprinkle with sesame seeds and press them gently into the surface.
Herb flatbread: Add 1 tablespoon finely chopped fresh herbs to the dough. Rosemary, thyme, and parsley are delicious options.
Yogurt flatbread: Increase the yogurt slightly and reduce the water as needed. This creates a softer, more tender flatbread, although the texture may differ from traditional pocket pita.
How to Make Pita Bread Ahead of Time
You can prepare the dough the evening before baking. After kneading, place it in a lightly greased bowl. Cover tightly and refrigerate overnight — the cold temperature slows fermentation. The next day, remove the dough from the refrigerator, allow it to warm slightly if needed, then divide it into portions, shape the rounds, and let them rest before baking. This method is especially convenient when you’re planning a family meal. You can also bake the pita bread ahead of time and reheat it shortly before serving.
How to Store Homemade Pita Bread
Allow the bread to cool completely. Place it in an airtight bag or container. Store at room temperature for approximately 2 days in a cool, dry kitchen. For longer storage, freeze the bread: separate individual pieces with parchment paper, place them in a freezer-safe bag, and remove as much air as possible. For the best quality, enjoy frozen pita within 2–3 months. Freezing is particularly useful if you make a large batch.
How to Reheat Pita Bread
Homemade pita bread tastes best when warm. Skillet method: heat a dry skillet over medium heat and warm each pita for approximately 20–30 seconds per side. Oven method: preheat the oven to 300°F (150°C), wrap the bread loosely in foil, and warm for approximately 5–8 minutes. Microwave method: wrap one or two pita breads in a slightly damp paper towel and microwave for approximately 10–15 seconds. Check the temperature and avoid overheating — microwaving for too long can make the bread chewy.
Common Mistakes to Avoid
Adding too much flour: too much flour makes the dough stiff and the finished bread dry — add extra flour sparingly. Not kneading enough: under-kneaded dough may not develop enough structure — knead until smooth and elastic. Skipping the resting time: resting makes the dough easier to shape and helps improve the texture. Baking on a cold surface: classic pita pockets benefit from a thoroughly heated baking surface. Leaving the bread uncovered: freshly baked pita can dry out quickly — cover it with a clean towel while it cools. Overbaking: pita bread doesn’t need to become deeply browned — overbaking can make it hard or brittle.
Frequently Asked Questions
Can I use all-purpose flour? Yes. All-purpose flour works very well for homemade pita bread. Bread flour may produce a slightly chewier texture.
Can I make pita bread without yogurt? Yes — the yogurt is optional. Leaving it out still gives soft, fluffy pita; the yogurt simply adds a slightly softer texture.
Nutrition (Approximate Per Pita, 8 Pitas, With Yogurt)
About 240 calories, 8 g protein, 4 g fat, 43 g carbohydrates.
Final Thoughts
Soft, fluffy, golden, and endlessly useful — this homemade pita bread is one of those recipes that earns a permanent place in your kitchen. It takes basic pantry ingredients, a little patience while the dough rises, and a hot oven, and it gives back bread that beats anything from a package. Serve it warm, fill it, dip it, or freeze a batch for later. Once you’ve made it yourself, you’ll never look at packaged flatbread the same way again.