

This 3 ingredient gluten free vanilla ice cream is the richest and creamiest ice cream of your life. No fancy ingredients or ice cream machine needed! Summer, here we come!
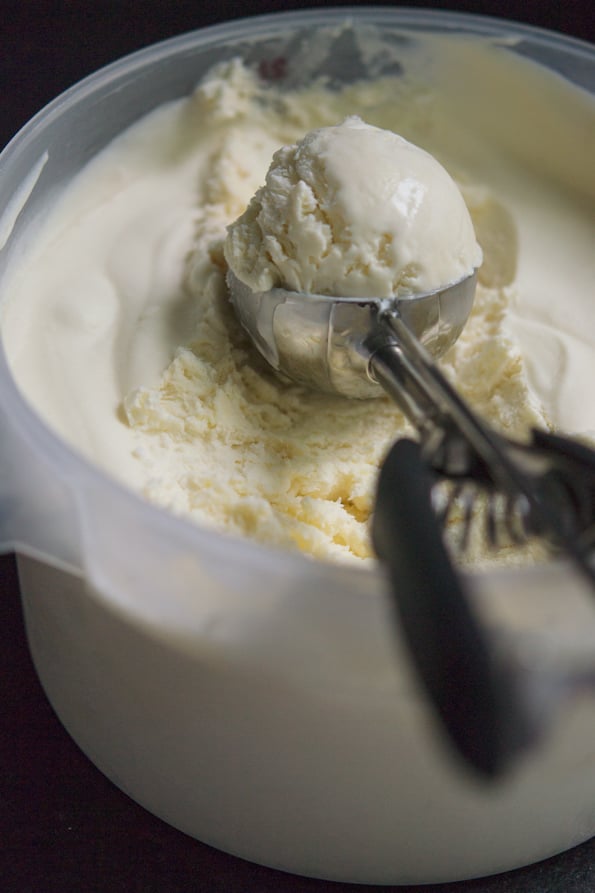
Table of Contents
Why not use an ice cream machine to make gf vanilla ice cream?
I have 2 ice cream makers, believe it or not. One is very old and cost me about $50—but still works. It’s the type that requires you to keep the bowl frozen. I rarely use it.
The other ice cream machine is a fancy compression ice cream machine that I thought for sure I would use all the time. You don’t have to freeze anything, and it does make beautiful ice cream out of almost anything—but it’s expensive and takes up a lot of counter space.
In fact, whenever I read a recipe that calls for an ice cream machine (you know – “churn according to manufacturer instructions”), my heart sinks, and I turn the page. It doesn’t seem like much of a recipe since nearly anything will have the consistency of ice cream if you put it in a machine and churn it.
The ice cream machines that utilize a frozen bowl also just don’t make very much ice cream, and they always freeze the ice cream unevenly, leaving you with a layer of ice cream that’s frozen solid around the perimeter of the machine. And since the inside is non-stick, the only way to get that ice cream out is to melt it. And then it’s not ice cream anymore!
The importance of low moisture content
I can’t emphasize enough how crucial low moisture content is for achieving smooth, velvety ice cream. It’s what helps us avoid those dreaded ice crystals that ruin the texture. By choosing ingredients with low moisture content, we ensure that our ice cream stays creamy and soft.
Why folding the ingredients is essential
You might be tempted to just mix everything together, but trust me, folding the ingredients is key. This gentle method of combining the whipped cream with the sweetened condensed milk and vanilla preserves the airiness of the whipped cream. That’s what gives our no-churn vanilla ice cream that luscious, melt-in-your-mouth texture that you’ll love.
Tips for serving and storing homemade ice cream
No one likes a soupy ice cream mess. Here are some tips for keeping your homemade ice cream in tip-top shape.
Best containers for freezing this vanilla ice cream
When it comes to freezing ice cream, I recommend using a 2-quart freezer-safe container with a tight-fitting lid. This helps keep any unwanted odors out and prevents freezer burn. Plus, it’s the perfect size for our no-churn ice cream recipe!
How to keep your ice cream from melting too fast
To prevent your ice cream from melting too quickly, be sure to serve it right from the freezer. Our no-churn ice cream is scoopable straight from the freezer, so no need to let it thaw.
Customizing your no-churn ice cream
One of the best things about gluten free vanilla ice cream is how easy it is to customize. Let’s have some fun!
Serve it in an ice cream cone
I have a recipe for gluten free ice cream cones, which are something of a labor of love. It also seems to be getting easier and easier to buy prepared gluten free ice cream cones.
But as the ice cream containers in the grocery store get smaller and smaller, and their ingredient lists get longer and longer, I find myself more interested than ever in making homemade ice cream.
Flavor variations for your vanilla ice cream base
Though our vanilla ice cream is simply divine, you can easily mix it up with different flavors. Try adding cocoa powder for chocolate, or a dash of peppermint extract for a refreshing twist.
More mix-ins and toppings for a fun twist
Get creative with mix-ins and toppings! Swirl in some fruit preserves, chocolate chips, or crushed gluten free cookies. Top your scoops with sprinkles, hot fudge, or a dollop of whipped cream.
Gluten Free Vanilla Ice Cream
Equipment
-
Hand mixer or stand mixer
Ingredients
- 1 pint (16 fluid ounces) heavy whipping cream, chilled
- 14 ounces sweetened condensed milk, (homemade or store bought)
- 2 teaspoons pure vanilla extract
Instructions
-
Place the cream in the bowl of a stand mixer fitted with the whisk attachment (or a large bowl with a handheld mixer) and beat the cream on medium, then medium-high speed until stiff peaks form.
-
Pour the sweetened condensed milk and the vanilla into the bowl of whipped cream, and fold the whipped cream in until only a few bright white streaks remain.
-
Pour the mixture into a 2-quart freezer-safe container with a lid, and smooth the top.
-
Cover tightly and place in the freezer until firm (at least 4 hours).
-
Serve right from the freezer. It will not need to thaw at all to be scoopable.
Notes
Originally posted on the blog in 2013. In 2017, photos the same, recipe steps tweaked slightly, video new; in 2023, more text resources added.
Nutrition information is approximate per quart of ice cream and should not be relied upon.